
How To Do Partition In Windows 11?

Partitioning your hard drive is a crucial practice that not only helps in better data management but also offers several other benefits, making it fundamental for any Windows 11 user. Whether you're looking to organize your files, improve system performance, or create a multi-boot configuration, partitioning provides a way to divide your physical hard drive into separate, independent sections. Each partition functions as its own storage unit, allowing for more flexibility and security in managing your data. Let’s discuss how to effectively manage your storage space on Windows 11.
Why You Should Consider Partition in Windows 11?
Partitioning a hard drive involves dividing the physical drive into separate logical sections, each appearing as an independent volume within the operating system. Here are some of the key benefits:
Partition In Windows 11
1. Improved Data Organization:
- Partitioning allows you to separate your data logically into distinct sections. For example, you can store your operating system, applications, and personal files on different partitions. This minimizes the risk of data loss or corruption in case of system failures, viruses, or software glitches. If one partition encounters issues, the others remain unaffected, ensuring the safety of your essential data.
2. Enhanced Performance:
- By dedicating specific partitions to particular tasks, you can prevent unnecessary fragmentation, leading to improved performance and faster access times for critical tasks. For instance, you can allocate a separate partition for resource-intensive applications or games.
3. Easy Backup and Recovery:
- Partitioning simplifies the backup and recovery process. You can create backups of specific partitions, making it easier to restore your system or personal files in case of emergencies. This level of granularity ensures that you only back up what’s necessary, saving both time and storage space.
4. Security and Privacy:
- Segregating sensitive data into a separate partition adds an extra layer of security. You can apply different access permissions and encryption for your private partition, making it more challenging for unauthorized users to access your personal information.
Unlock the benefits of local SEO with DigiPix our proven strategies connect your business with nearby customers, increase foot traffic & drive qualified leads.
Improve your local search rankings, appear in Google Maps results & build credibility with campaigns designed to maximize your reach.
See measurable growth with enhanced visibility, more website visits from local customers & a strategy focused on dominating local searches.
Start Free Now
5. Multi-Boot Configurations:
- Partitioning is essential if you need to run multiple operating systems on the same computer. Each OS can reside on its own partition, enabling smooth and independent functioning. This is particularly useful for developers, testers, or users who need to experiment with various operating systems.
How to Partition Your Hard Drive in Windows 11
Windows 11 has an estimated 21.66% share of all PCs, with an estimated 8.1% of all devices including mobile, tablet, and console 98, running Windows 11. That makes it crucial to learn the methods of partition in it. Partitioning your hard drive in Windows 11 can be done through various methods, each catering to different user preferences and expertise levels. Below, we provide two methods—using Disk Management and the Settings app—along with step-by-step guides.

How To Partition Your Hard Drive
Create a Partition in Windows 11 Using Disk Management
Windows 11 comes equipped with a built-in Disk Management tool, allowing users to partition their hard drives with more control over partition sizes, drive letters, and file systems. This method is suitable for users who need advanced disk management capabilities.
When to Choose:
- When you want to create a partition from unallocated space or shrink an existing partition to free up space for a new partition.
- When you need to assign a specific drive letter or choose from more partition formatting options.
Why to Choose:
- Advanced Disk Management: Disk Management provides comprehensive disk management capabilities, allowing you to handle complex partitioning scenarios like resizing, deleting, or extending partitions.
- Control Over Drive Letters: You can manually assign drive letters to new or existing partitions, giving you better control over how they appear in File Explorer.
Unlock the benefits of local SEO with DigiPix our proven strategies connect your business with nearby customers, increase foot traffic & drive qualified leads.
Improve your local search rankings, appear in Google Maps results & build credibility with campaigns designed to maximize your reach.
See measurable growth with enhanced visibility, more website visits from local customers & a strategy focused on dominating local searches.
Start Free Now
Step-by-Step Guide:
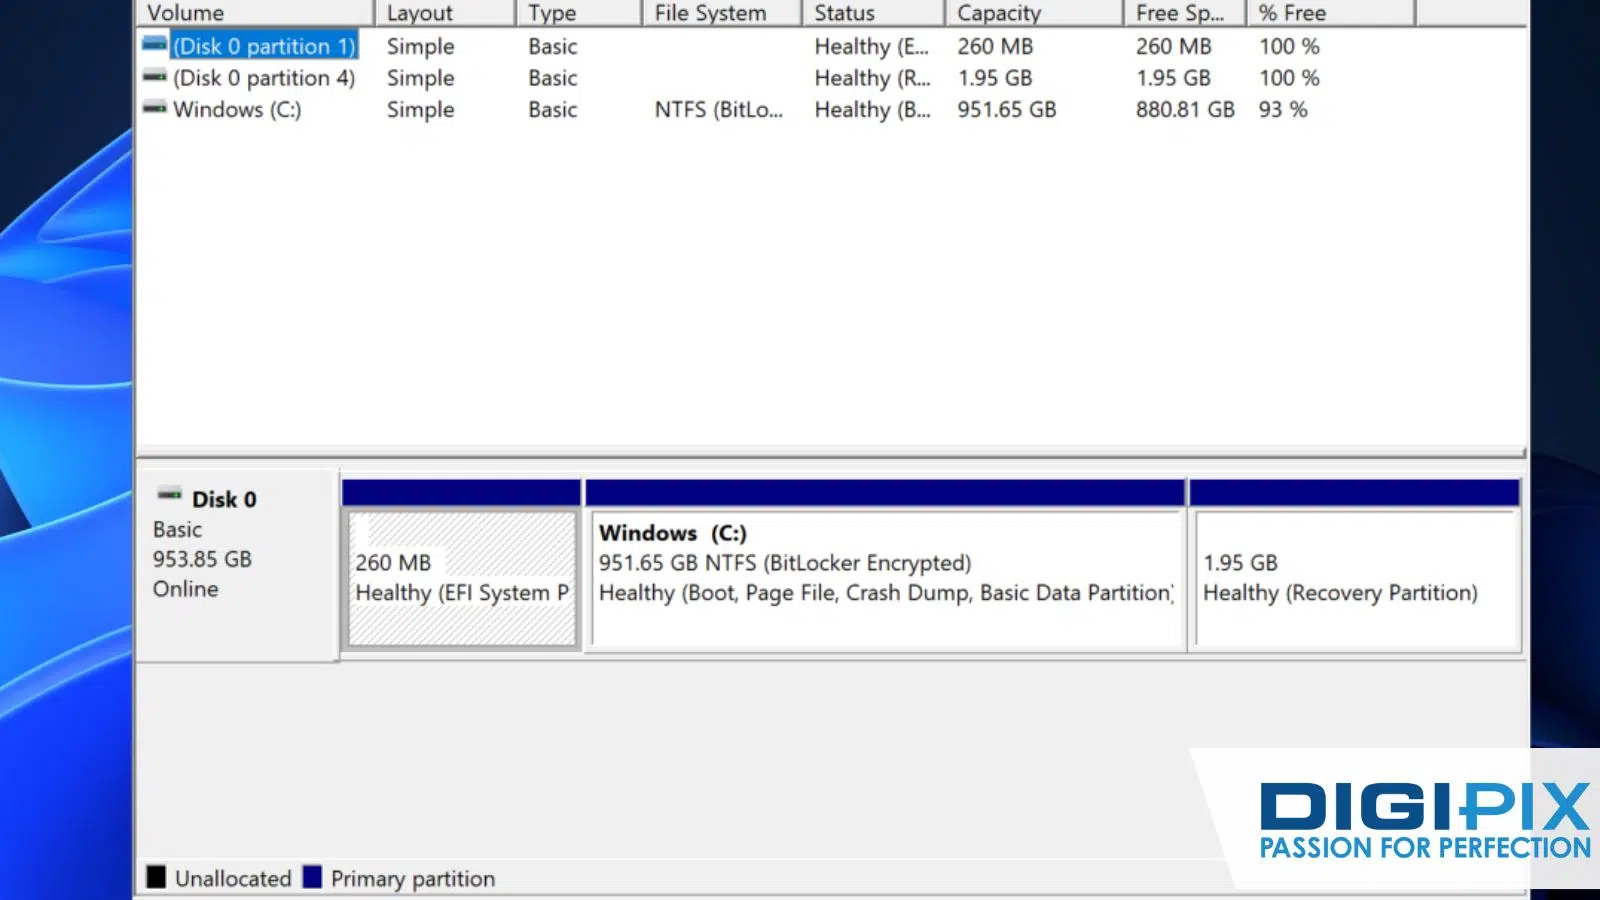
1. Open Disk Management:
- Open the Start menu and search for "Create and format hard disk partitions." Click on the top result to open the Disk Management app.
2. Create a New Partition:
- Right-click on the drive with "Unallocated" space and select "New Simple Volume."
- Follow the "New Simple Volume Wizard" to specify the size, drive letter, file system, and volume label for the new partition.
- Click "Finish" to complete the process and create the partition.
3. Delete and Merge Partitions:
- If you need to delete a partition, right-click on the partition in Disk Management and select "Delete Volume." Remember to back up any important data before proceeding, as this will result in the loss of all data stored in the partition.
- To merge unallocated space with an existing partition, right-click on the partition you want to extend and select "Extend Volume." Follow the Extend Volume Wizard to allocate the unallocated space to the partition.
Table: Summary of Disk Management Method
|
Step |
Action |
Purpose |
|
1.Open Disk Management |
Access the tool via Start menu |
Begin managing partitions |
|
2. Create Partition |
Use "New Simple Volume" wizard |
Define new partition space and settings |
|
3.Delete/Merge Partition |
Use "Delete Volume" and "Extend Volume" options |
Remove or combine partitions for optimized space |
Create a Partition in Windows 11 Using the Settings App
For users who prefer a more straightforward approach, the Settings app in Windows 11 offers a user-friendly interface for partitioning your hard drive. This method is ideal for those who may not be as comfortable with complex disk management tools.

Create Partition Using The Settings App
When to Choose:
- When you have unpartitioned space available on your hard drive and want to create a new partition quickly and easily.
- When you prefer a guided, step-by-step process in a more visually appealing interface.
Why to Choose:
- User-Friendly Interface: The Settings app offers an intuitive interface, making it easy for users with limited technical expertise to create a new partition.
- Quick Format Option: The option to perform a quick format allows you to swiftly prepare the new partition for use.
Unlock the benefits of local SEO with DigiPix our proven strategies connect your business with nearby customers, increase foot traffic & drive qualified leads.
Improve your local search rankings, appear in Google Maps results & build credibility with campaigns designed to maximize your reach.
See measurable growth with enhanced visibility, more website visits from local customers & a strategy focused on dominating local searches.
Start Free Now
Step-by-Step Guide:
1. Open the Settings App:
- Open the Settings app on your Windows 11 PC.
- Click on "Storage" in the left sidebar.
2. Navigate to Disk Management:
- Under the "Storage Management" section, click on "Advanced storage settings."
- Click on "Disks & volumes."
3. Create a New Partition:
- Select the SSD or HDD storage where you want to create the new partition.
- Identify the "Unallocated" space and click the "Create volume" button.
- Provide a label for the new partition.
- Choose a drive letter to make the partition accessible in File Explorer.
- Select the NTFS file system for the partition.
- Specify the desired size for the partition.
- Click on "Advanced" and check the "Perform a quick format" option.
- Click "Format" to create, format, and prepare the partition for storing files.
Table: Summary of Settings App Method
|
Step |
Action |
Purpose |
|
1. Open Settings |
Access the app via Start menu |
Begin storage management |
|
2. Navigate to Storage Management |
Use "Advanced storage settings" |
Locate disks and volumes |
|
3. Create Partition |
Use the "Create volume" and "Format" options |
Define and format new partition |
Optimize Your Hard Drive Space With Ease!
Partitioning your hard drive on Windows 11 is a fundamental practice that brings numerous benefits to your computing experience. Each method of creating a partition on Windows 11 offers its unique advantages, catering to different user preferences and requirements. The Settings app is user-friendly and perfect for quick and simple partitioning, while Disk Management provides more granular control over partition sizes and configurations.
By choosing the method that best aligns with your expertise level, partitioning needs, and overall preferences, you can optimize your hard drive space, improve data organization, and enjoy a seamless computing experience on Windows 11.
For more expert tips and in-depth guides on making the most of your Windows 11 experience, visit DigiPix.INC or contact Khurram Qureshi at DigiPic INC. Whether you need help with storage optimization, system performance, or any other tech-related inquiries, we’re here to assist you. Let’s enhance your Windows 11 journey together!
Request A Quote

Written By: Khurram Qureshi
Founder & consultant of DigiPix Inc.
Call or text: 416-900-5825
Email: info@digipixinc.com
About The Author
In 2005, Khurram Qureshi started DigiPix Inc. which started off as a design agency offering video editing to professional photography, video production & post production, website designs and 3D Animations and has now expanded towards online marketing and business consultancy. Khurram Qureshi also is a motivational figure and participates in local and international platforms. He also play a role in the local community development, helping local young minds get ready to enter the job market.